VIP stands for vulkan_interp_python.
As of June 6, 2025, the current version is 0.66(tentative).
2025/7/13 (v0.67)
Fixed a bug where, although duplicate frames were normally removed at each scene change, this process was not performed for the final scene.
This software uses ffmpeg and rife-ncnn-vulkan. Please note that the ffmpeg build included here is not licensed for commercial use.
For more information about rife-ncnn-vulkan, please refer to [this page].
Previously, I rewrote the software introduced in [this article] using Python, making it compatible with both Windows and Ubuntu.
Nowadays, real-time frame interpolation is no longer rare, as graphics cards can handle it natively. However, this tool is unique in that it takes into account duplicate frames commonly found in anime—such as 2s and 3s (frames held for two or three exposures)—and performs interpolation accordingly.
Furthermore, with the transition to Python, the app now supports smooth interpolation of scenes with gradual changes, like fade-ins and fade-outs, without causing video artifacts or breakdowns.
The three videos below are examples of how it can be created.
This article is intended to disclose the technology, not to be used for watching videos.
2026/3/28 (v0.70)
This major update introduces JSON-based configuration management and high-precision scene change detection powered by PySceneDetect.
Let’s get started!
System Requirements
As mentioned in the article above, this software runs on Vulkan, so it does not depend on a specific GPU brand.
That said, your hardware must support Vulkan at a minimum.
In other words, as long as your system supports Vulkan, even an integrated GPU (such as those built into CPUs) will work.
If you are using Windows, you will need to install Python.
You can download Python here:
https://www.python.org/downloads/release/python-3123/
While most recent versions should work, my development environment used Python 3.12.3 on Ubuntu, so I’ve provided the link to that version for your reference.
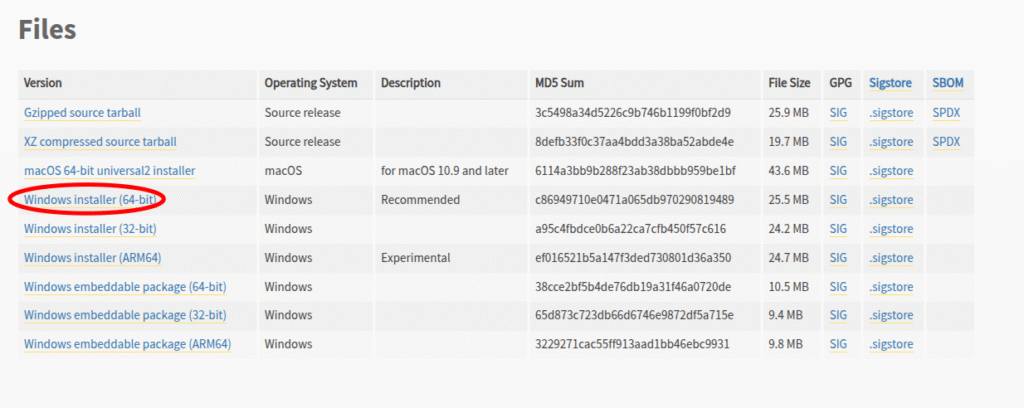
Be sure to check “Add Python 3.12.3 to PATH” during the installation.
If you are using Linux, you do not need to install Python.
Notes:
- If OneDrive is enabled, the process may stop unexpectedly.
- On one of my home PCs with Trend Micro (called “Virus Buster” in Japan) installed, the process was interrupted partway through.
I don’t think many users have such security software enabled, but please be aware of this possibility.
Download
The binary files for each supported OS are provided in compressed format.
GitHub Link.
Getting Started (Windows)
“I previously distributed binary files, but due to false positive virus detections, I have switched to a new launch method and updated the instructions. Although the detailed guide is currently only available in Japanese, please refer to the article below.”
False virus detection of the self-made script “VIP”
バージョン 0.70 以降、PySceneDetect が統合されました。そのため、仮想環境 (uv や python-venv など) で実行することを強くお勧めします。ただし、Windows ではテストしていません。Ubuntu ガイドと同様に、以下のコマンドを実行すればおそらく動作するでしょう。
「uv venv --python /usr/bin/python3 source"
” .venv/bin/activate"
“uv pip install scenedetect av opencv-python-headless"
ただし、現時点では、この設定は、何をしているのかを理解している上級ユーザー向けです。
Getting Started Ubuntu
Version 0.70 incorporates PySceneDetect.
Therefore, the environment setup method has changed.
#!/bin/bash

sudo apt install curl

curl -LsSf https://astral.sh/uv/install.sh | sh
source $HOME/.local/bin/env
You can use python-venv, conda, or anything else for the virtual environment, but this time we’ll build it using “uv” as shown above.
uv venv --python /usr/bin/python3
source .venv/bin/activate

uv pip install scenedetect av opencv-python-headless

On Ubuntu, ffmpeg is not downloaded automatically.
Please install it yourself using a command like:
sudo apt install ffmpegAs long as you have installed the appropriate graphics drivers for your system, hardware encoding with VAAPI should work.
You’re now all set on Ubuntu.
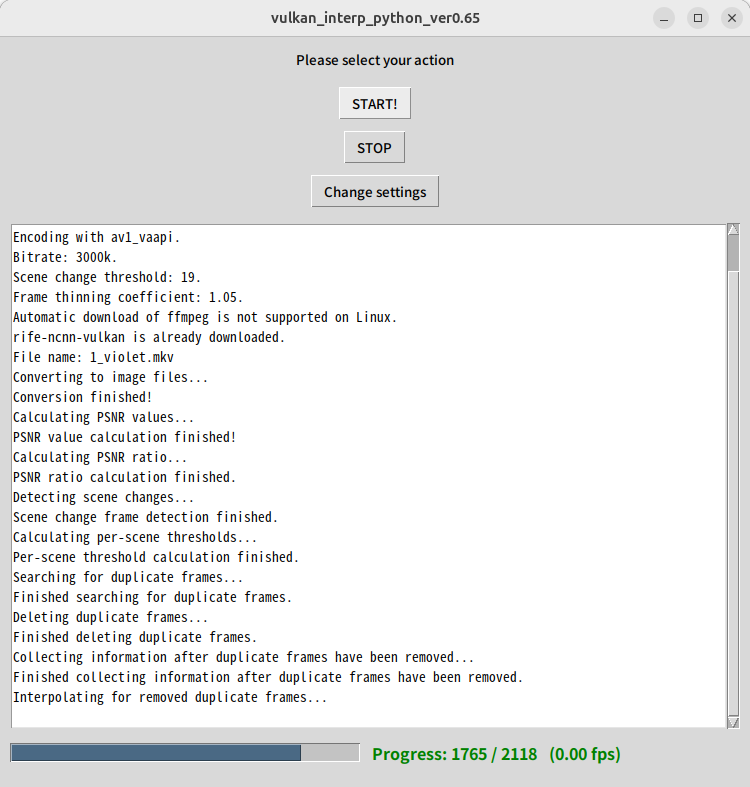
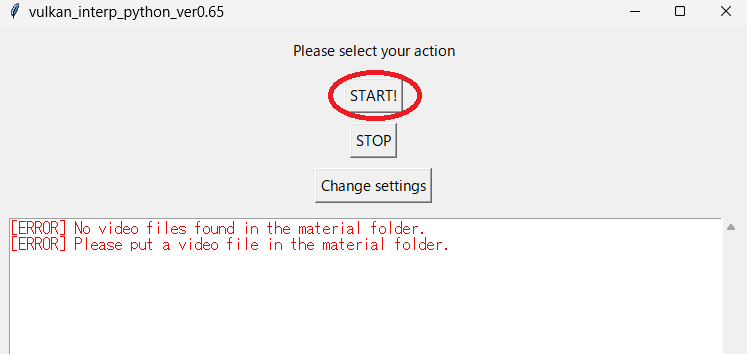
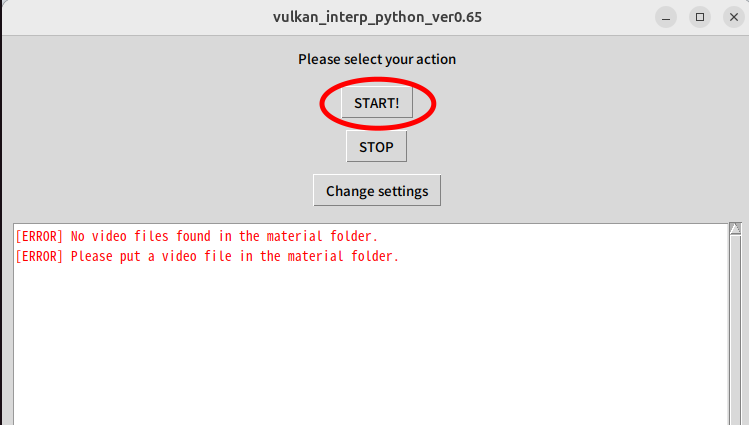
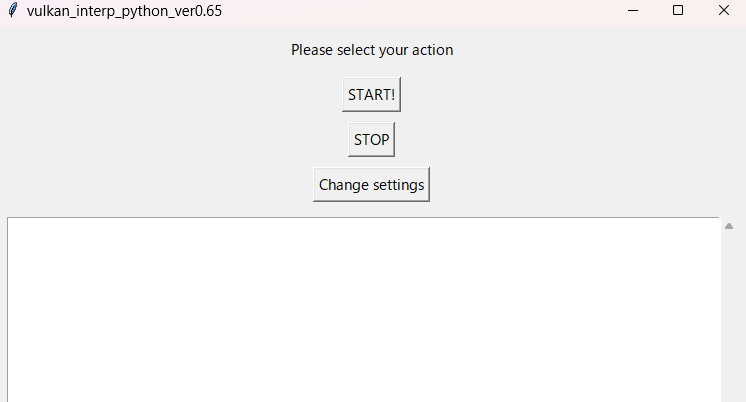
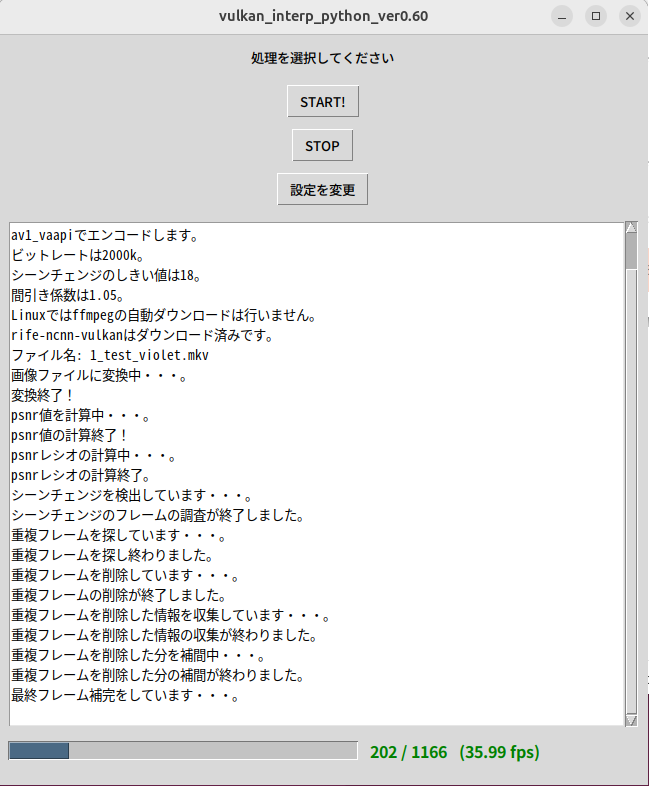
Main Screen Description
START!
Click this button to start the interpolation process.
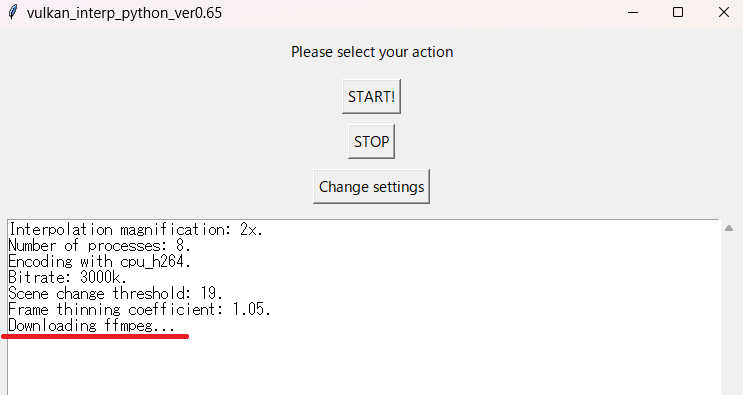
It might take some time, so please be patient and wait for the downloads to finish.
STOP
This button is used to interrupt the process.
However, since it only stops the process at the function level, it’s not very useful in its current state.
In practice, you may need to close the window using the “X” button to actually stop the process.
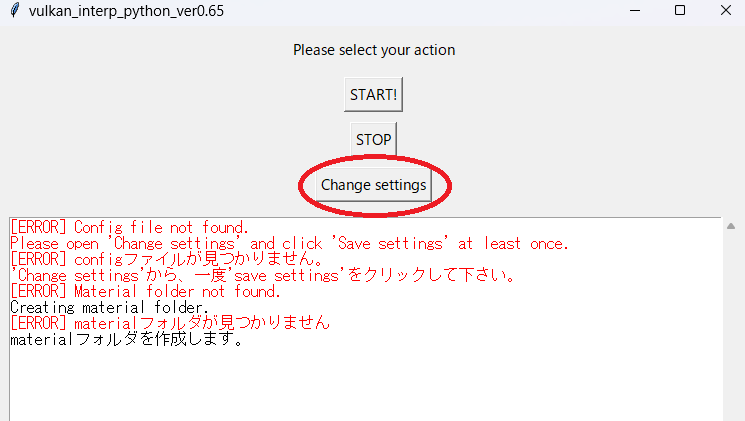
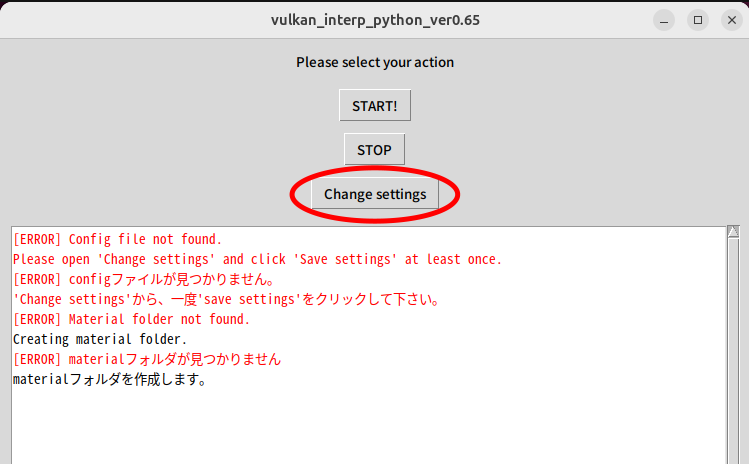
Change Settings
This is explained below.
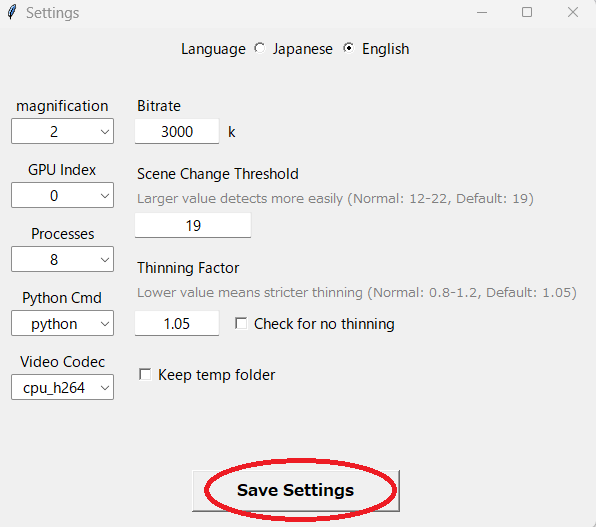
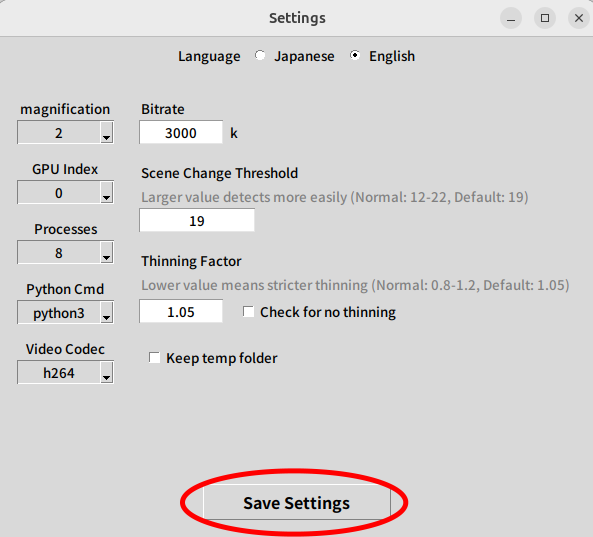
Settings Details
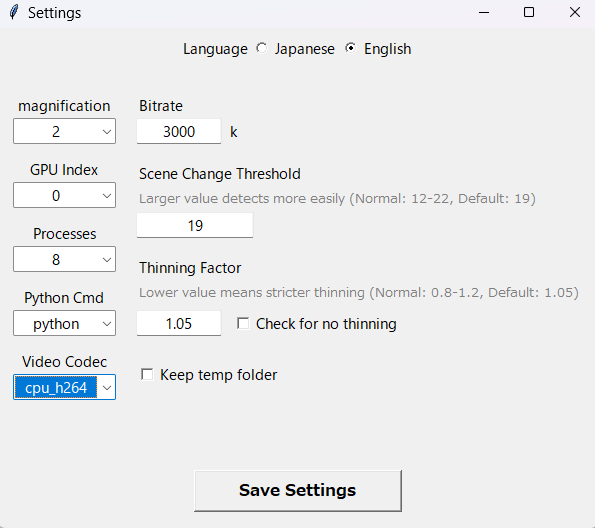
Magnification
This sets the final frame multiplication factor. The process can take more time than expected, so it’s best to start with a lower magnification.
GPU Index
You can select 0, 1, or 2. Ideally, it would be possible to use all GPUs in parallel, but currently, you can only use one at a time. This may be improved in a future update.
You might wonder, “Which GPU does ‘0’ refer to?”—this actually depends on your system. Usually, if you don’t have an integrated GPU, “0” refers to the discrete GPU.
Please try different settings to see what works best on your setup.
Processes
This sets how many parallel processes are used when interpolating frames with RIFE, specifically to fill gaps left after duplicate frames are removed.
The optimal value depends on your PC, but there is generally no benefit to setting it higher than the number of logical CPU cores. From my own experience, a slightly lower value may work better.
Python Cmd
You can choose between “python” and “python3.”
Normally, you won’t need to change this. If you’ve installed Python as described, the default should work fine.
This specifies the command name used by the program when calling Python in the background.
If you’re using Linux, just try changing it only if the software doesn’t work.
Video Codec
On Windows, you can choose from several codecs:
For GeForce, select “nvenc.”
For Radeon, select “amf.”
For Intel, select “qsv.”
The “cpu” option should work on any system.
By the way, even if you select a codec that isn’t supported, VIP itself won’t display an error.
However, if you try to play the resulting video, you may get a playback error. The actual error message will depend on your video player. The example shown in the photo uses VLC.
Bitrate
This is the bitrate used when encoding the video.
Check the quality of the output video and adjust this value to your preference.
Scene Change Threshold
There are points in a video where the scene changes significantly, but these are not considered during interpolation.
If two completely different scenes are interpolated together, it can result in severely distorted images.
This threshold is used to automatically detect and remove such frames after processing.
As explained in the window, increasing the threshold makes detection more sensitive.
However, if the value is set too high, the video may look choppy due to the way the processing works.
Normally, the default value should be fine. If you notice significant distortion, try raising it slightly.
Thinning Factor
This value affects the detection of duplicate frames.
Videos may have both dark and bright scenes.
If you use the same threshold value throughout the entire video, the detection rate may vary between scenes.
To address this, the software now calculates the thinning factor “for each scene.”
The default value is 1.05, which means the automatically calculated value is multiplied by 1.05.
Feel free to adjust this to your liking, depending on the results.
No Thinning (Checkbox)
Thinning frames can have a major impact on the look of the animation.
If you want to preserve the original style, check this option.
However, if you prefer not to thin frames, you might as well use a real-time interpolation tool.
Keep Temp Folder
If you check this box, the temp folder containing all intermediate files will be kept after processing.
If you’re interested in seeing what files are generated during the process, you can enable this option.
About PSNR Values
I’m not an expert on this myself, but PSNR values are used by ffmpeg to detect scene changes. (ffmpeg actually has a built-in scene change detection feature, but I couldn’t find a way to know exactly which frames it deleted, so I’m not using that feature here.)
PSNR quantifies the pixel-level difference between two images.
Generally, the higher the value, the more similar the two images are.
A value around 50–60 typically indicates that the images are almost identical, but this can vary depending on the content.
When two images are a perfect match, PSNR returns “inf” (infinity), but in this software, I set it to return “50” instead.
This software uses PSNR values for various processing steps.
If, in the future, image similarity can be judged by AI, this method may become obsolete.
I may consider adding such features in a future update.
Conclusion
I’m not an IT professional—just an amateur “Sunday programmer.”
There are probably a lot of bugs and issues, so if you notice anything, please feel free to leave a comment. I’ll update the software if possible.
The main reason I made this app was simply because I wanted a benchmarking tool for my own use.
I often use it to benchmark when I change graphics cards. (For example, I frequently use a 90-second ending video from Violet Evergarden for my own tests, though I can’t upload it due to copyright issues…)
I don’t expect many people to stumble upon this article, but if you do, I’d be glad to hear about your own benchmark results.
It would be even better if we could agree on a common video to use for testing.
That’s all for now.
Note:
Inspired by the article ‘Frame Interpolation using BiM-VFI,’ I’ve developed an inference tool based on this method. Please feel free to check it out.
Note:
We have confirmed that errors can occur during the process of converting videos to images.
This issue seems to happen mainly with videos encoded using AV1 hardware encoders.
It appears that AV1 encoders (such as those provided by NVENC, QSV, AMF, etc.) still have compatibility issues across different vendors.
If possible, please use videos encoded with traditional encoders, or videos encoded with a software-based AV1 encoder.
Note:
On a system with Ubuntu and an ARC B580, I found that some interpolated frames were replaced by black images.
To fix this, you need to build rife-ncnn-vulkan from source and replace the downloaded version with your custom build.
If there’s interest, I’ll write an article about how to do this.
コメント