Amazonのアソシエイトとして、当ブログは適格販売により収入を得ています。
Ubuntu編に続いてWindows編やっていきます。
とはいっても、以前記事にした
intel ARCでstable-siffusionを使ってみよう(Windows編)
で説明した手順とほとんど同じです。
たぶん、応用ですでに自力でComfyUIをインストールした人もいるんじゃないかと思います。
おおまかな手順として
- Microsoft visual C++ 再頒布可能パッケージのインストール
- gitをインストール
- minicondaをインストール
- Anaconda promptで以下のコマンドを実行
conda create -n a1111 python=3.10.16
conda activate a1111
git clone https://github.com/comfyanonymous/ComfyUI.git comfyUI
cd comfyUI
python -m venv venv
venv\Scripts\activate.bat
conda install libuv
python -m pip install torch==2.5.1+cxx11.abi torchvision==0.20.1+cxx11.abi torchaudio==2.5.1+cxx11.abi intel-extension-for-pytorch==2.5.10+xpu --extra-index-url https://pytorch-extension.intel.com/release-whl/stable/bmg/us/
pip install -r requirements.txt
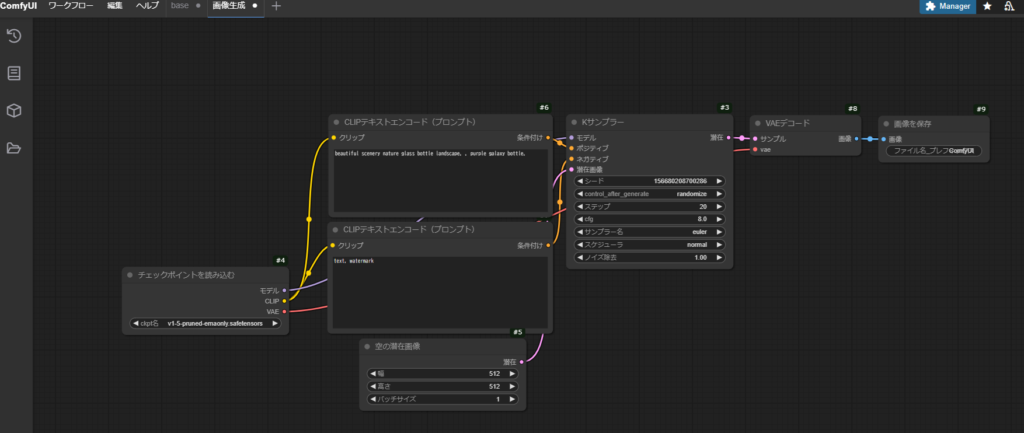
python .\main.py --auto-launch --novramで終了です。
conda環境は以前「stable diffusion」で構築した「a1111」があればそのまま使っても大丈夫です。
カスタムpytorchのインストールは時期によって異なると思いますので
https://intel.github.io/intel-extension-for-pytorch/index.html#installation?platform=gpu
上記リンクにて最新のコマンドに置き換えてください。
ポイントは「python .\main.py –auto-launch –novram」の前に
「pip install -r requirements.txt」を実行する点くらいです。
「–novram」は付けなくてもいいですが、使用するモデルに気をつけましょう。
nVIDIAのカードみたいに柔軟にメインメモリに割り当ててクラッシュを防いでくれる訳ではなさそうです。
とはいえ、「–novram」を付けるとバカみたいにメインメモリを食います。
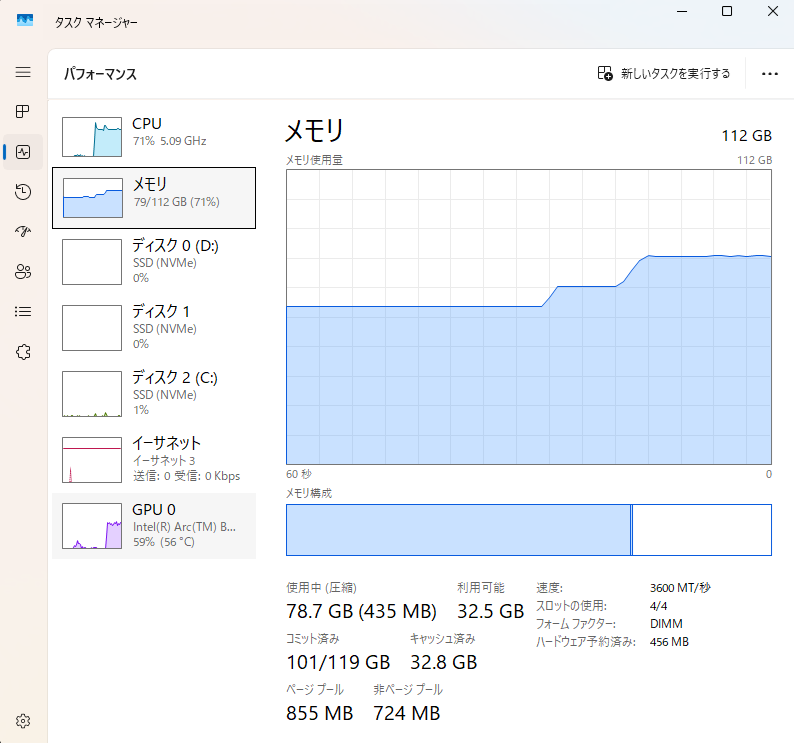
こんな感じです。
この為に、メモリを急遽買い足しました。
今後のドライバのアップデートなりで改善されるかもしれません。
気長に待ちましょう。
今回は以上です。
追記(2025/9/28)
最近アクセスが多いみたいなのでちょっと補足。
この記事の情報も古くなってきています。
pytorchはIPEXもありますが、torch.xpuも出てきました。
ここの記事に書いています。
pytorchのインストール方法も常に変化していますので、
https://docs.pytorch.org/docs/stable/notes/get_start_xpu.html
上のリンクで確認してください。
追記2
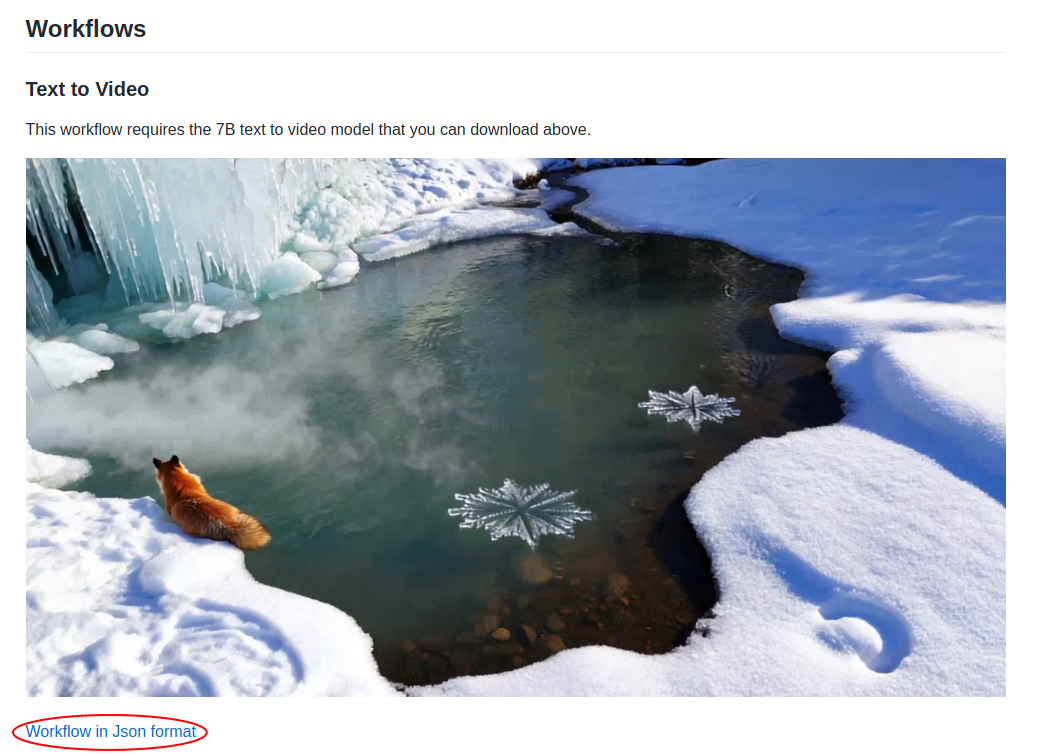
動画生成AIでもモデルファイルがVRAMに収まる場合は生成速度はどうなるのか?
こちらの記事でモデルファイルがVRAMに収まる場合の記事を書いてみました。
モデルも優秀なようでかなりの高速化が期待できます。
よかったらどうぞ。
追記3
最近は次世代品「ARC B580」がおすすめです。
https://amzn.to/4iv7wPq
人気のリファレンスモデル「ARC B580 Limited Edition」です。
ttps://amzn.to/3FuTa37
ASRockのSteel legendは白色です。
https://amzn.to/3R92rjK
長さ控えめなChallengerも。
https://amzn.to/3Rdo4PO
コメント