Introduction
In my previous article, I explained the process as “Building the Linux kernel on Ubuntu 22.04” → “Building PyTorch.” However, I found out that building the Linux kernel is not necessary. My apologies. Therefore, I am rewriting the article with updated steps.
Let’s go through the process step by step.
Table of Contents
- Overview of PyTorch Build Process
- Installing Required Files
- Installing Drivers and oneAPI
- Installing FFmpeg
- Installing Miniconda
- Starting the PyTorch Build
- Migrating to Ubuntu 24.10
- Installing Stable Diffusion on Ubuntu 24.10
- Installing Drivers and oneAPI
- Installing pyenv
- Installing WHL Files
PyTorch Build Process
The overall process for building PyTorch on Ubuntu 22.04 includes:
Installing Required Files
sudo apt -y update
sudo apt install -y curl
sudo apt install -y build-essential
Previously, when building the Linux kernel, the necessary files were already installed. However, since we are not building the kernel this time, the above files should be installed in advance.
Installing Drivers and oneAPI
Installing Intel GPU Drivers
#!/bin/bash

# Install the Intel Graphics GPG public key.
wget -qO - https://repositories.intel.com/gpu/intel-graphics.key | \
  sudo gpg --yes --dearmor --output /usr/share/keyrings/intel-graphics.gpg

# Configure the package repository.
echo "deb [arch=amd64,i386 signed-by=/usr/share/keyrings/intel-graphics.gpg] https://repositories.intel.com/gpu/ubuntu jammy client" | \
  sudo tee /etc/apt/sources.list.d/intel-gpu-jammy.list

sudo apt update -y

sudo apt install -y libze1 intel-level-zero-gpu intel-opencl-icd clinfo libze-dev intel-ocloc intel-level-zero-gpu-raytracing

sudo usermod -aG render $USER
sudo usermod -aG video $USER
Installing oneAPI Base Toolkit
#!/bin/bash

sudo apt update -y

wget -O- https://apt.repos.intel.com/intel-gpg-keys/GPG-PUB-KEY-INTEL-SW-PRODUCTS.PUB | gpg --dearmor | sudo tee /usr/share/keyrings/oneapi-archive-keyring.gpg > /dev/null

echo "deb [signed-by=/usr/share/keyrings/oneapi-archive-keyring.gpg] https://apt.repos.intel.com/oneapi all main" | sudo tee /etc/apt/sources.list.d/oneAPI.list

sudo apt update -y

sudo apt install -y intel-oneapi-base-toolkit
Installing FFmpeg
FFmpeg is required for building torchvision.
sudo apt install ffmpegAfter installation, verify that 「--enable-shared」 is enabled with:
ffmpeg -versionInstalling Miniconda
According to Intel’s PyTorch Extension installation guide, we need to build within a Conda environment.
cd ~
mkdir -p install
cd install
curl -O https://repo.anaconda.com/miniconda/Miniconda3-latest-Linux-x86_64.sh
bash ./Miniconda3-latest-Linux-x86_64.sh
Proceed with installation by pressing Enter repeatedly, and choose “yes,” “Enter,” and “no” as required.
echo "export PATH=~/miniconda3/bin:$PATH" >> "$HOME/.bashrc"
echo "source ~/miniconda3/etc/profile.d/conda.sh" >> "$HOME/.bashrc"
source ~/.bashrc
Configuring Conda Environment
#Update conda to the latest version.
conda update -n base -c defaults conda

#Set conda-forge as the default channel.
conda config --add channels conda-forge
conda config --set channel_priority strict

#Create a conda environment.
conda create -n env_test python=3.10
source activate env_test

conda update --all
Since Stable Diffusion runs on Python 3.10, we ensure the build uses Python 3.10.
Building PyTorch
cd ~
mkdir -p pytorch_build
cd pytorch_build

#Add the following lines to「 .bashrc.」
echo "source /opt/intel/oneapi/setvars.sh" >> "$HOME/.bashrc"
source ~/.bashrc
Running the above script deactivates the Conda environment, so we need to reactivate it:
source activate env_testDownload the build script and start the build:
wget https://github.com/intel/intel-extension-for-pytorch/raw/v2.5.10%2Bxpu/scripts/compile_bundle.sh
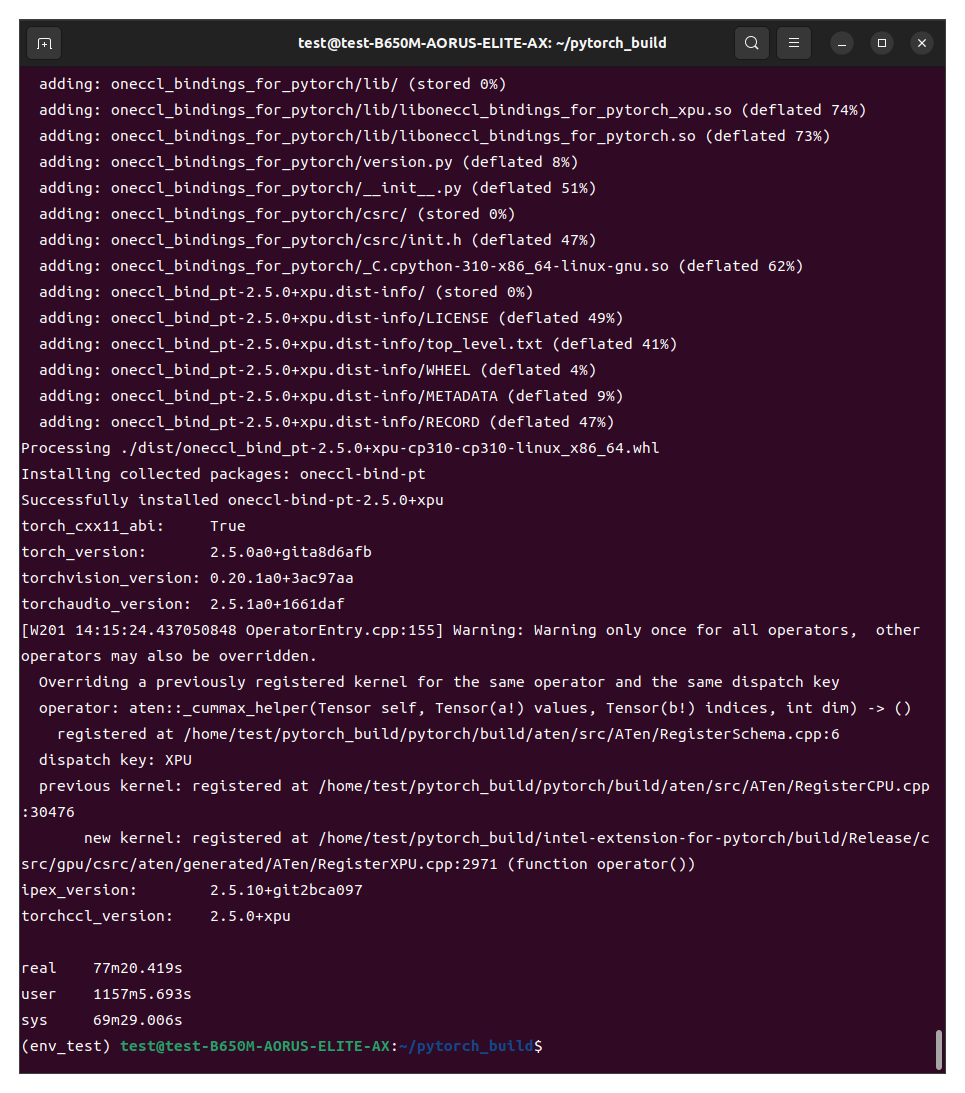
bash compile_bundle.sh /opt/intel/oneapi/compiler/latest /opt/intel/oneapi/mkl/latest /opt/intel/oneapi/ccl/latest /opt/intel/oneapi/mpi/latest /opt/intel/oneapi/pti/latest lnl-m 2> >(tee -a error_log.txt >&2)Start the build process using the script above.
The target for the build is ‘Lunar Lake’ (option: lnl-m).
If the build is successful, a dist folder will be created inside the intel-extension-for-pytorch, audio, pytorch, torch-ccl, and vision directories.
The binary files should be inside these folders, and you can install them in your Ubuntu 24.10 environment.
Once the PyTorch build is successful and the .whl files are generated, copy them to a USB drive or any other storage device.
Now, let’s proceed with installing Stable Diffusion on Ubuntu 24.10.
Here’s the step-by-step process.
Installing Stable Diffusion on Ubuntu 24.10
Installing Drivers and oneAPI
#!/bin/bash

sudo apt -y update
sudo apt -y upgrade
sudo apt -y install software-properties-common

# Add the intel-graphics PPA for 24.10
sudo add-apt-repository -y ppa:kobuk-team/intel-graphics

# Install the compute-related packages
sudo apt install -y libze-intel-gpu1 libze1 intel-ocloc intel-opencl-icd clinfo intel-gsc

# Install the media-related packages
sudo apt install -y intel-media-va-driver-non-free libmfx1 libmfx-gen1 libvpl2 libvpl-tools libva-glx2 va-driver-all vainfo intel-level-zero-gpu-raytracing

sudo usermod -aG render $USER
sudo usermod -aG video $USER
#!/bin/bash
sudo apt update -y
wget -O- https://apt.repos.intel.com/intel-gpg-keys/GPG-PUB-KEY-INTEL-SW-PRODUCTS.PUB | gpg --dearmor | sudo tee /usr/share/keyrings/oneapi-archive-keyring.gpg > /dev/null
echo "deb [signed-by=/usr/share/keyrings/oneapi-archive-keyring.gpg] https://apt.repos.intel.com/oneapi all main" | sudo tee /etc/apt/sources.list.d/oneAPI.list
sudo apt update -y
sudo apt install -y intel-oneapi-base-toolkitInstalling pyenv
#!/bin/bash

sudo apt install git build-essential libssl-dev zlib1g-dev \
    libbz2-dev libreadline-dev libsqlite3-dev curl \
    libncursesw5-dev xz-utils tk-dev libxml2-dev libxmlsec1-dev libffi-dev liblzma-dev

git clone https://github.com/pyenv/pyenv.git ~/.pyenv

cd ~/.pyenv && src/configure && make -C src

echo 'export PYENV_ROOT="$HOME/.pyenv"' >> ~/.bashrc
echo 'command -v pyenv >/dev/null || export PATH="$PYENV_ROOT/bin:$PATH"' >> ~/.bashrc
echo 'eval "$(pyenv init -)"' >> ~/.bashrc

source ~/.bashrc

pyenv install 3.10.16
Once you have finished installing pyenv,
cd ~
mkdir -p AI_ARC
cd AI_ARC

pyenv local 3.10.16
You can name the folder whatever you like; I named mine ‘AI_ARC.’
As for the Python version, I used 3.10.16, but any 3.10 version should work fine.
Installing WHL Files and Running Stable Diffusion
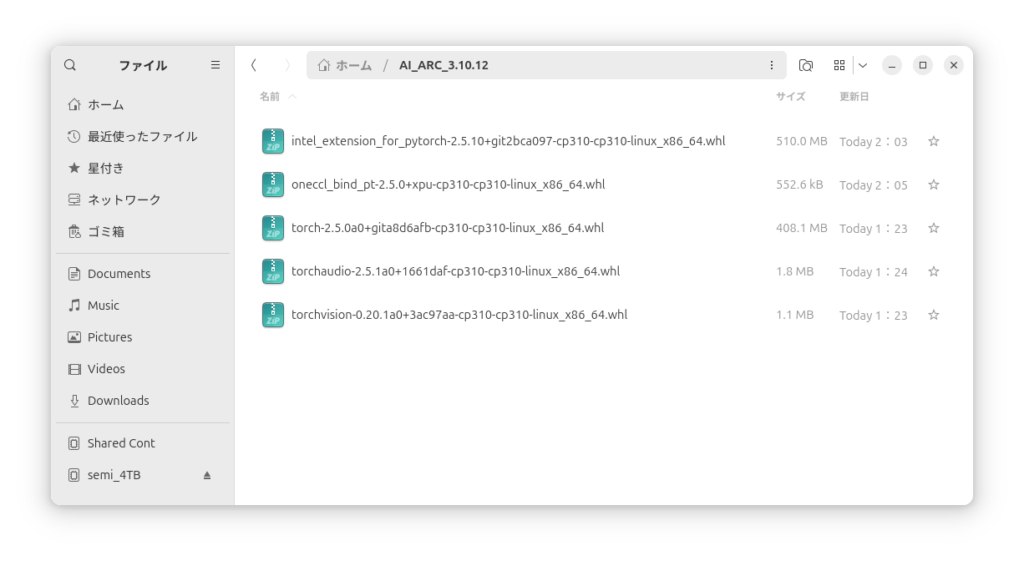
Now, let’s install the .whl files that were copied earlier.
The current directory should be 「AI_ARC」.
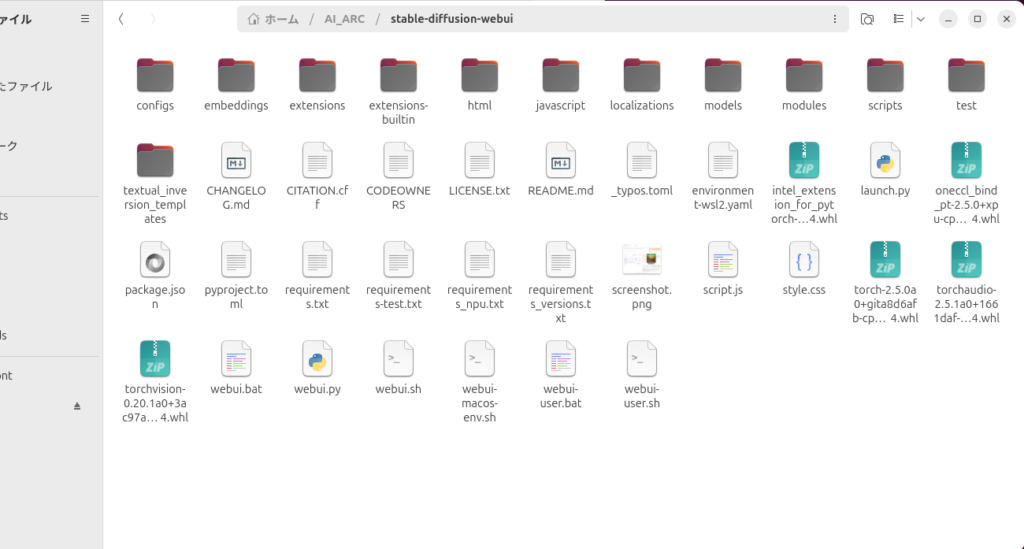
git clone https://github.com/AUTOMATIC1111/stable-diffusion-webuiUse the script above to install Stable Diffusion.
Then, paste the five .whl files you created earlier into the folder.
Proceed with setting up the virtual environment.
cd ./stable-diffusion-webui
sudo apt install git python3 python3-pip python3-venv
python3 -m venv venv
source ./venv/bin/activate
next
pip install ./intel_extension_for_pytorch-2.5.10+git2bca097-cp310-cp310-linux_x86_64.whl ./oneccl_bind_pt-2.5.0+xpu-cp310-cp310-linux_x86_64.whl ./torch-2.5.0a0+gita8d6afb-cp310-cp310-linux_x86_64.whl ./torchaudio-2.5.1a0+1661daf-cp310-cp310-linux_x86_64.whl ./torchvision-0.20.1a0+3ac97aa-cp310-cp310-linux_x86_64.whlRun the script above to install the .whl files.
Note that the file names may vary depending on when they were built, so adjust them accordingly.
Once done,
./webui.sh --use-ipexRun Stable Diffusion.
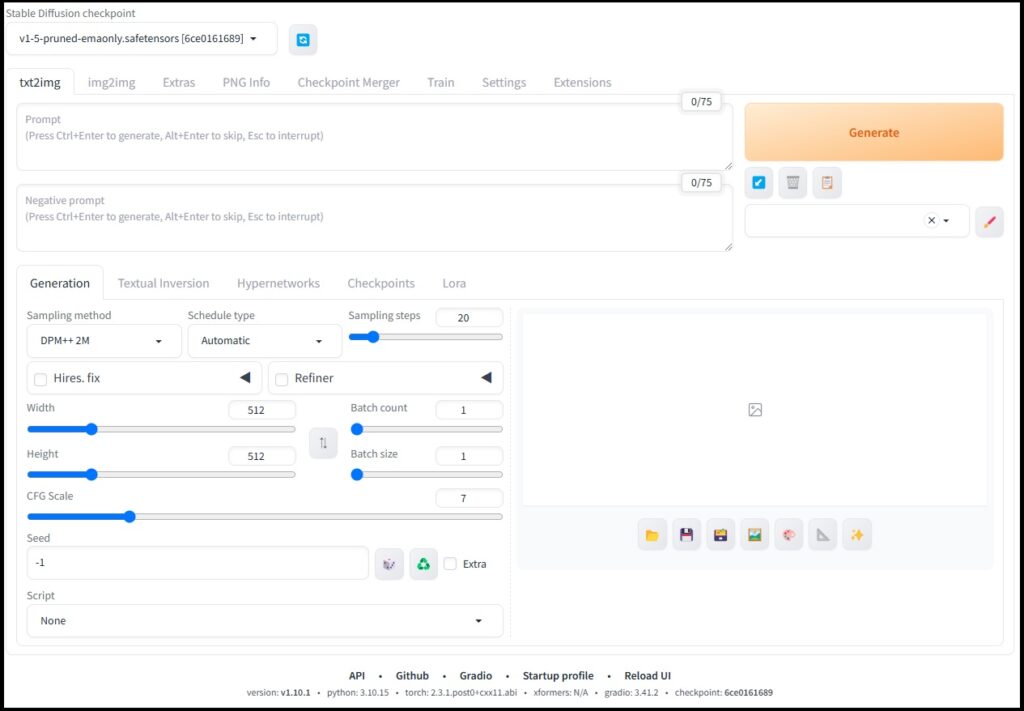
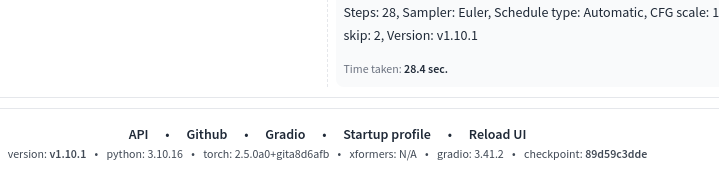
Here are the results from the Hello Asuka benchmark.
The performance is quite similar to Windows.
Building PyTorch takes a significant amount of time and often fails multiple times, so this guide is for those with the patience and dedication to see it through.
Feel free to use this information if you find it helpful.
Additional Notes
note
If you encounter errors like “Segmentation Fault” and cannot complete the build, check your memory settings.
There are many memory modules available, such as DDR5-5600 and DDR5-6000.
I initially ran my system with CrucialPro DDR5-6000 (24GB × 2) at DDR5-6000, but persistent failures led me to try DDR5-4800, which worked successfully.
I haven’t heard much about similar issues with DDR4, but it’s something to consider.
If you’ve tried everything and still can’t get it to work, keep this in mind.
And if all else fails…
Just wait for official support.
Sometimes, things just aren’t meant to work yet
note2
ComfyUI is also working.
If you’re interested in video generation, give it a try.
Running ComfyUI on Intel ARC B580 (Ubuntu Edition)


コメント